
hampton bay ceiling fan instruction manual
Hampton Bay Ceiling Fan Instruction Manual: A Comprehensive Guide
This comprehensive guide details installation, operation, and maintenance for your Hampton Bay ceiling fan, ensuring optimal performance and longevity.
It covers wiring diagrams, troubleshooting, and safety precautions, referencing models like the Hawkins and Comfort Breeze, alongside remote control functionality.
Understanding Your Hampton Bay Ceiling Fan
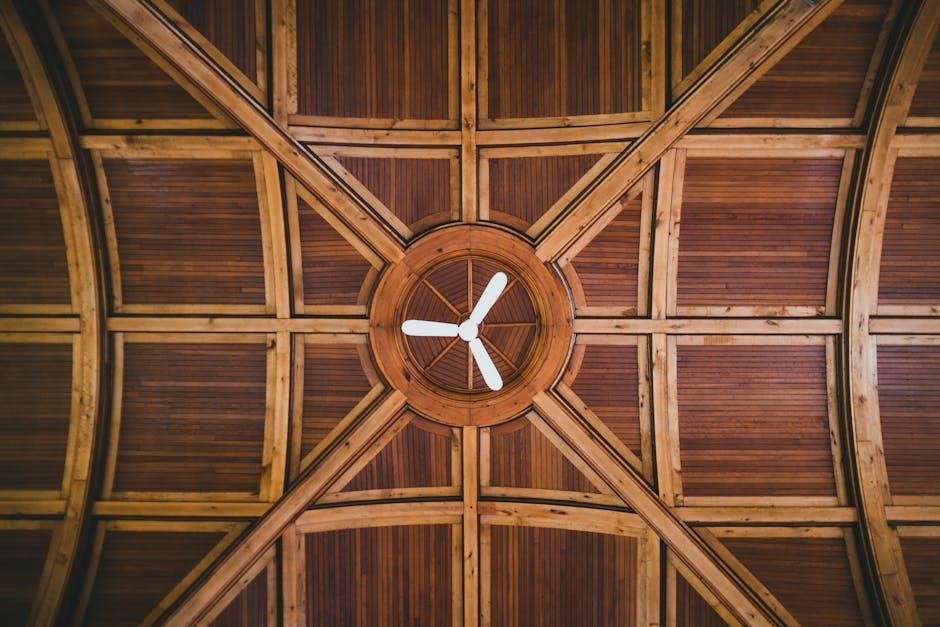
Your Hampton Bay ceiling fan is designed for both aesthetic appeal and efficient air circulation, offering comfort throughout the year. Familiarize yourself with the fan’s components – the motor housing, blades, canopy, and light kit (if included).
Different models, such as the Hawkins 44-inch and various hugger-style fans, cater to diverse ceiling heights and room sizes. Understanding the specific features of your model, referencing the included manual or online resources like ManualsBase, is crucial.
The Comfort Breeze remote control, compatible with many Hampton Bay fans, provides convenient operation. Proper installation and adherence to safety guidelines, detailed in the service manual, are paramount for safe and effective use.
Fan Model Identification
Accurate fan model identification is the first step towards successful installation and maintenance. Hampton Bay offers a wide array of ceiling fans, including the Hawkins (122135), and various 52-inch models (176-925).
Locate the model number typically found on a sticker affixed to the motor housing. This number is vital when searching for specific manuals or replacement parts on platforms like ManualsBase or Manualzilla.
Knowing your fan’s model allows you to access tailored instructions, wiring diagrams, and troubleshooting advice. Different models may have unique features, blade attachment methods, or remote control compatibility. Referencing the correct documentation ensures a safe and efficient process.
Safety Precautions
Prioritize safety during installation and maintenance. Always disconnect power at the circuit breaker before commencing any work on the ceiling fan; Ensure the mounting structure can support the fan’s weight.
Use appropriate safety glasses to protect your eyes from falling debris. Never work alone; have an assistant to help lift and secure the fan. Carefully follow wiring instructions to avoid electrical shock or fire hazards.
Inspect blades for damage before installation. Secure all screws and connections tightly. Keep children and pets away from the work area. Adhering to these precautions minimizes risks and ensures a safe installation process.
Tools Required for Installation
Proper tools are essential for a successful Hampton Bay ceiling fan installation. You will need a screwdriver set (Phillips and flathead), wire strippers, and wire connectors. A voltage tester is crucial for verifying power is off before wiring.
A ladder or sturdy step stool provides safe access to the ceiling. Pliers are helpful for bending and securing wires. A drill with appropriate bits may be needed for mounting bracket installation.
Measuring tape ensures accurate placement, and a level guarantees the fan hangs straight. Consider a blade balancing kit for optimal performance. Having these tools readily available streamlines the installation process.

Installation Process
Begin by carefully mounting the bracket, then wiring the fan according to the provided diagrams. Securely attach the motor assembly and blades, finishing with the canopy installation.

Mounting Bracket Installation
Securely attaching the mounting bracket is crucial for a safe and stable installation. First, ensure the electrical supply is completely switched off at the breaker. Locate a ceiling joist capable of supporting the fan’s weight; using a stud finder is recommended.
Align the bracket with the joist and mark the screw locations. Drill pilot holes, then firmly fasten the bracket using appropriate screws – often supplied with the fan. Double-check the bracket’s stability before proceeding.
For concrete ceilings, use concrete anchors designed for ceiling fan support. Ensure the bracket sits flush against the ceiling, minimizing any wobble during operation. A properly installed bracket is the foundation for a long-lasting and quiet fan.
Wiring the Ceiling Fan
Before commencing, absolutely disconnect the power supply at the breaker box. Identify the ceiling’s hot (usually black), neutral (white), and ground (green or bare copper) wires. The fan’s wiring will mirror these colors.
Connect the fan’s hot wire to the ceiling’s hot wire, the neutral to neutral, and the ground wire to the ground. Use wire connectors, ensuring a secure connection.
For 110V systems, standard wiring applies. 220V systems, if applicable, require specific wiring configurations – consult a qualified electrician. Carefully tuck the wires into the electrical box, avoiding pinching or strain.
Double-check all connections before proceeding to the next step, prioritizing safety and correct functionality.
Identifying Hot, Neutral, and Ground Wires
Accurate wire identification is crucial for safe installation; Typically, the hot wire is black, carrying the electrical current. The neutral wire is white, providing the return path. The ground wire is either bare copper or green, offering a safety path in case of a fault.
Use a non-contact voltage tester to confirm the hot wire – it will indicate the presence of electricity. The neutral wire should not register voltage. The ground wire is often connected to the metal electrical box.
If unsure, consult an electrician. Incorrect wiring can lead to fire hazards or electrical shock. Always prioritize safety and double-check your identifications before making any connections.
Wiring for 110V Systems
For 110V systems, connect the fan’s black wire (hot) to the supply’s black wire. Connect the fan’s white wire (neutral) to the supply’s white wire. Finally, connect the fan’s ground wire (bare copper or green) to the supply’s ground wire, or the grounding screw in the electrical box.
Ensure wire connectors are securely fastened, preventing loose connections. Double-check all connections before restoring power. If your fan includes a light kit, a separate blue wire may control the light – connect this to the switched hot wire if desired.
Always turn off power at the breaker before wiring. Improper wiring can cause damage or create a safety hazard.
Wiring for 220V Systems (If Applicable)
If your Hampton Bay fan is designed for 220V, the wiring differs significantly. Connect the fan’s black wire to the 220V supply’s black wire. The fan’s other wire, often red, connects to the 220V supply’s other hot wire. The neutral wire is typically not used in a 220V circuit.
Crucially, ensure the ground wire (bare copper or green) is securely connected to the grounding screw or supply ground. Incorrect 220V wiring is extremely dangerous and can cause severe electrical shock or fire.
Consult a qualified electrician for 220V installations. Verify compatibility before proceeding, and always disconnect power at the breaker.
Attaching the Fan Motor Assembly
Carefully lift the fan motor assembly and align it with the mounting bracket. Ensure the wiring is neatly tucked into the bracket’s compartment, avoiding any pinching or strain. Gently raise the motor assembly until it rests securely on the bracket.
Most models utilize a pin and slot system or screws for secure attachment. Confirm the assembly is firmly seated and cannot easily rotate or detach. Double-check all connections before proceeding.
Properly securing the motor assembly is vital for safe and wobble-free operation. Refer to your specific model’s diagrams for precise instructions.
Blade Installation
Attach the fan blades to the blade brackets using the provided screws. Ensure each screw is tightened securely, but avoid over-tightening, which could damage the blade or bracket. Repeat this process for all blades, ensuring consistent alignment.
Next, connect the blade brackets to the motor housing. Again, use the provided screws and tighten them firmly. Verify that all blades are securely attached and evenly spaced.
Allow a 24-hour breaking-in period after installation, as minor noises are common initially. Inspect the blade attachments periodically to maintain optimal performance and safety.
Blade Balancing Procedures
If your ceiling fan wobbles, balancing the blades is crucial. Begin by using the balancing kit provided with your Hampton Bay fan. Attach the clip to the trailing edge of one blade, midway between the blade tip and the motor.
Turn the fan on to a medium speed and observe if the wobble improves or worsens. Repeat this process with each blade, noting which blade causes the greatest improvement when the clip is attached.
Once identified, use the provided weights to counteract the wobble. Attach the weight to the top of the blade, directly above where the clip was most effective. Adjust weight placement until wobble is minimized.
Canopy Installation
After securing the mounting bracket and wiring, carefully lift the fan motor assembly and align it with the bracket. Gently push the fan upwards, ensuring the downrod ball seats correctly within the bracket’s housing.
Slide the canopy upwards to conceal the mounting bracket and wiring. Ensure the canopy is a short distance from the ceiling, as specified in the manual, allowing for proper ventilation and preventing overheating.
Secure the canopy using the provided screws. Tighten them firmly, but avoid over-tightening, which could damage the canopy or mounting bracket. A snug fit is essential for a clean and safe installation.

Remote Control Operation
Utilize the included remote to effortlessly control fan speed, lighting, and the reverse function, offering convenient operation of your Hampton Bay ceiling fan.
Remote Control Pairing
Establishing a connection between your Hampton Bay ceiling fan and its remote control is crucial for seamless operation. Initially, ensure the fan is powered off. Locate the receiver unit within the fan’s canopy – it’s typically a small module.
Next, insert fresh batteries into the remote, observing correct polarity. Power on the fan. Most models require a specific pairing sequence, often involving pressing and holding a ‘learn’ or ‘sync’ button on both the receiver and the remote simultaneously for several seconds.
A successful pairing is usually indicated by the fan light blinking or a confirmation signal. If pairing fails, repeat the process, ensuring close proximity between the remote and the fan. Consult your specific model’s manual for detailed instructions, as procedures can vary.
Remote Control Functions
Your Hampton Bay remote offers convenient control over your ceiling fan’s features. Speed Settings allow you to adjust airflow – typically Low, Medium, and High – for personalized comfort. The Light Control function manages the integrated light kit, often including on/off and dimming capabilities.
The Reverse Function is vital for seasonal adjustments; in summer, a downward airflow creates a cooling breeze, while winter requires an upward airflow to distribute warm air. Some remotes include a timer function for automated operation.
Familiarize yourself with the specific button layout on your remote, as designs may differ between models. Proper use of these functions maximizes energy efficiency and enhances your living environment.
Speed Settings
Hampton Bay ceiling fans typically offer multiple speed settings, controlled via the remote or pull chain. Low speed provides a gentle breeze, ideal for quiet relaxation or maintaining minimal airflow. Medium speed balances comfort and energy efficiency, suitable for everyday use.
High speed delivers maximum cooling power, perfect for warmer temperatures or quickly circulating air. Adjusting the speed allows you to customize the fan’s performance to your preferences and the ambient conditions.
Experiment with each setting to find the optimal balance between comfort and energy savings. Remember that higher speeds consume more electricity, so choose wisely!
Light Control
Hampton Bay ceiling fans with integrated light kits offer convenient illumination controlled through the remote or pull chain. Remote control functionality often includes on/off switching, dimming capabilities, and sometimes, preset lighting scenes. Pull chain operation typically allows for simple on/off and, in some models, stepped brightness levels.
Ensure the bulb wattage matches the fan’s specifications to prevent overheating or damage. If the light flickers or doesn’t illuminate, check the bulb, wiring connections, and remote control batteries.
Proper light control enhances the fan’s versatility, providing both airflow and ambient lighting.
Reverse Function
The reverse function on your Hampton Bay ceiling fan alters blade direction, impacting airflow and seasonal comfort. In summer, counter-clockwise rotation creates a downdraft, providing a cooling breeze. Conversely, in winter, clockwise rotation gently circulates warm air trapped near the ceiling, enhancing heating efficiency.
Activation is typically achieved via a switch on the fan motor housing or through the remote control. Allow a 24-hour breaking-in period after changing direction to observe the full effect. Utilizing this feature optimizes energy savings and year-round comfort within your home.
Regularly switching directions maximizes the fan’s benefits.

Troubleshooting Common Issues
This section addresses frequent problems like a non-functioning fan, wobbling, excessive noise, and light kit malfunctions, offering solutions for optimal performance.
Fan Not Working
If your Hampton Bay ceiling fan fails to operate, begin by verifying the power supply. Ensure the circuit breaker hasn’t tripped and the wall switch is in the ‘on’ position. Next, inspect the remote control batteries, replacing them if necessary, and confirm proper pairing with the receiver.
Carefully examine the wiring connections within the canopy, ensuring all wires are securely fastened and correctly matched – hot to hot, neutral to neutral, and ground to ground. A loose connection is a common culprit. If using a remote, check the receiver unit for any blown fuses.
Finally, allow a 24-hour ‘breaking-in’ period for new installations, as initial noises or temporary malfunctions can sometimes resolve themselves. If the issue persists, consult a qualified electrician to diagnose potential motor or electrical component failures.
Fan Wobbling
Excessive fan wobbling can be addressed through several steps. First, verify all blade screws are tightened securely, as loose blades are a primary cause. Next, utilize the included balancing kit – typically consisting of clips and weights – to identify and correct imbalances. Attach the clips to various blade locations, one at a time, and observe if wobbling improves.

If improvement occurs, permanently affix a weight to the corresponding blade location. Ensure the canopy is positioned a short distance from the ceiling, avoiding contact that can exacerbate vibrations. Confirm the mounting bracket is firmly attached to the ceiling joist.
Finally, check that all blades are at the same height and angle. Persistent wobbling may indicate a warped blade or a faulty motor; in such cases, contact customer support.
Noise Reduction Techniques
Addressing fan noise often involves a systematic approach. Begin by ensuring all screws – blade brackets, motor housing, and canopy – are tightened securely. Loose components can rattle during operation. Allow a 24-hour “breaking-in” period, as initial noises often diminish with use.
Check for obstructions near the blades, such as light fixtures or curtains, which can create airflow turbulence. Lubricate the motor bearings according to the maintenance guidelines, as friction can generate noise. If wobbling is present, address it immediately, as imbalance contributes to sound.
Verify the mounting bracket is firmly secured to a ceiling joist, preventing vibrations. Consider using rubber washers between the canopy and ceiling to dampen sound transmission.
Light Kit Issues
Troubleshooting light kit problems starts with verifying the bulb is securely installed and compatible with the fixture’s wattage rating. If the light doesn’t illuminate, check the wiring connections within the canopy and light kit housing, ensuring they are firm and correct. Confirm the remote control’s light function is active and properly paired.
Inspect the light kit’s wiring for any signs of damage or fraying, replacing if necessary; Consider a faulty light switch or dimmer switch as potential causes. Remember to disconnect power before inspecting any wiring.
If using LED bulbs, ensure they are fully compatible with the fan’s control system; some LEDs may cause flickering or humming.

Maintenance and Care
Regular cleaning and lubrication are vital for sustained performance. Dust accumulation reduces efficiency, while proper care extends the fan’s lifespan considerably.

Cleaning Your Ceiling Fan
Maintaining a clean ceiling fan is crucial for optimal performance and longevity. Dust accumulation on the blades significantly reduces airflow efficiency, forcing the motor to work harder; Before cleaning, always turn off the power at the circuit breaker or wall switch to prevent accidental operation and potential injury.
Use a soft brush or microfiber cloth to gently wipe down the blades, starting from the base and moving towards the tip. For stubborn dirt, a slightly damp cloth with mild detergent can be used, but avoid excessive moisture, which could damage the motor or wood finish.
The fan motor housing and light fixtures can also be cleaned with a damp cloth. Ensure all components are completely dry before restoring power. Regular cleaning, ideally monthly, will keep your Hampton Bay ceiling fan operating efficiently and looking its best.
Lubrication Guidelines
Proper lubrication is essential for ensuring the smooth and quiet operation of your Hampton Bay ceiling fan. Most modern ceiling fans, however, are designed to be permanently lubricated and do not require routine oiling. Attempting to lubricate a sealed motor can cause damage and void the warranty.
If your fan model does feature oil ports (typically found on older models), use only a lightweight, non-detergent electric motor oil. Apply a few drops into each oil port, and rotate the fan blades by hand to distribute the lubricant. Avoid over-oiling, as this can attract dust and create a sticky residue.
Regularly inspect the fan for any unusual noises, which could indicate a need for professional servicing. Do not disassemble the motor in an attempt to lubricate it yourself.
Warranty Information
Hampton Bay warrants the fan motor to be free from defects in workmanship and materials present at the time of purchase. This warranty typically covers the motor for a period of lifetime, but specific terms and conditions may vary depending on the model and date of purchase.
Warranty coverage generally excludes damage caused by improper installation, misuse, accidents, or unauthorized repairs. Keep your original purchase receipt as proof of date and location of purchase. To make a warranty claim, contact Hampton Bay customer service or return the fan to the place of purchase;
Other fan components, such as blades and light kits, may have a shorter warranty period. Refer to your specific product documentation for complete details.